Any homesteader should know how to put horseshoes on a horse. Shoeing is a vital part of life at a homestead, but it requires a bit of training before you’re ready to attempt fully fixing a new shoe to any of your horses’ feet. The horse’s foot is extremely sensitive; you should learn from a farrier or professional first.
What is a Farrier?
Professionals who practice shoeing horses and treating horse feet in preparation for that shoeing are called farriers. These individuals are responsible for using equipment to clean and prep a hoof, sizing it for a new shoe, and fixing said shoe onto the foot using nails with sharp points or glue.
A farrier needs special training as a blacksmith to be able to make the shoe. Not all blacksmiths are farriers, just as not all farriers are blacksmiths. A blacksmith is the one responsible for ensuring that the shoe is the correct shape, but a farrier is the one who puts the shoe on.

Why Horse Shoes are Important
Horse shoes (also written as “horseshoes”) are seen as temporary protection for most horses to wear when they’re working or being ridden on. A farrier will apply horseshoes to any domesticated horse that is going to be spending much of their time on flooring that is considered to be rugged. This includes concrete (such as the paths you may find at suburban stables) stone and gravel, and uneven or rocky terrain.
Shoes are especially important on horses that are used for working in fields, show jumping, and competitions. Good shoes can help absorb the shock from the hard rides that horses are put through. You can even use corrective shoeing to assist the animal when they have an uneven tread that may have been the result of an injured foot.
Most farriers won’t just shoe your horse and be done with it. Adjustments sometimes need to be made after the animal is shod, and you’ll be needing a farrier to do that, too. A Shoeing schedule is important to stick to. The only time you won’t need a farrier is when you need a blacksmith or you’ve gone and completed professional farrier training yourself.
Why Barefoot Horses are Fine to Ride
Domesticated horses that are barefoot can damage their feet. In a riding school that consists of large, grassy areas, these animals may not need shoes. However, a horse is likely to be shod if the school is in an urban or suburban place. Some rural schools and stables shoe their horses, too. This is usually because the stables and schools exist near uneven terrain that isn’t natural for animals to walk on.
If the animal you’re going to be riding isn’t wearing shoes, there’s no harm in quickly asking your instructor why. Ask inquisitively, rather than demanding the answer. Your instructor will be happy to talk to you about why their horses don’t need shoes, and it can be a great learning experience for new riders. The foot of the horse is hardy, and we’ll explain more about that next.
Why Don’t Wild Horses Need Shoes?
Wild horses or horses that live in rural areas away from rough, manmade terrain, don’t need shoes because horseshoes are a human construction. Horses have been around for approximately 50 million years. They have long developed the necessary protections that they need to traverse across the known world without our little human devices.
On average, a wild horse can walk 30 to 40 miles in just one day. Horses who are barefoot over long periods of time build up their own protection as each foot develops a thicker sole and a stronger hoof wall. There’s no need for these wild horses to have nails driven through their hoof wall and the edge of the shoe that domestic horses wear because they have their own natural protection against the terrain of the earth.
How to Put a Shoe on Your Horse’s Hoof: A Step By Step Guide
A horse owner who has had their horses shod by a professional should continue to go to that professional until they have the training, themselves. Even then, it’s up to the owner who they want pulling shoes from their horses and replacing them, but we recommend a professional farrier who will know the ins and outs of horses and their shoes. You don’t exactly want a novice making nail holes in your horse’s feet or using a hoof knife or hoof pick wrong.

To give you an idea of all that is involved in removing and replacing horseshoes, here’s a handy guide:
Step One: Removing Old Horseshoes
To start the shoeing process, you’ll need to keep your animal nice and relaxed and get their foot in position so that you can remove the old shoes. Give your horse some hay or other treats to munch on while you get started, or have another person soothing the animal.
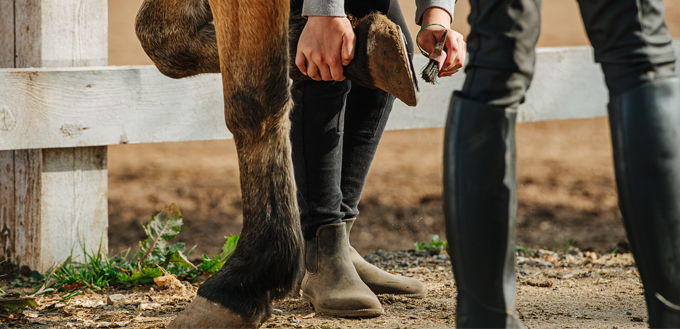
The correct way to start this procedure is to make your horse aware of your presence. When working on their back legs, gently pat them on the rear, then run your hand down their leg to ask them to lift it. Squeeze the tendon that lies above their ankle and raise their hoof so you can see what you’re doing.
The animal will instinctively shift their weight to their other legs to reblance their centre of gravity. You don’t need to worry about your horse toppling over unless you have an injured horse that can’t bear weight.
Tuck your hip in right next to the hock of your lad or lady – this is the large joint that is part of their hind leg at the back. Use the inside of your knee to prop the foot between your legs and raise the hoof up to face you. Be sure to continuously praise and soothe the animal after all movements and while you work.
To remove any existing shoes, straighten the clinch (the bent nail tip) of each nail by using a clinch cutter or hammer. Use metal pull-offs to loosen and remove the shoe. It’s best to work from the outside in to get the shoe off effectively.
Step Two: Cleaning the Hoof
Clean the bottom of the hoof to ensure there is no dirt or environmental debris trapped by the hoof wall when the new shoe is installed. Use a hoof pick with careful, downward strokes to get the dirt off. Be mindful of the triangular part of the hoof in the middle of the foot. This is the frog and it’s very sensitive.
A hoof knife can then be utilized to remove the hard outer layer of the hoof sole. This dark layer is excess skin that needs to be taken off. You’ll see a white line or surface under the harder parts of the skin. This white area is healthy.
Step Three: Trimming the Hoof Wall
Once the white area of the hoof is revealed once more, you can go ahead and start trimming the hoof wall. When a horse is shod, removing the excess sole and trimming the wall is like giving your horse a manicure.
The edge of the hoof should only extend up to 3.75 inches from the hairline on the foot. A set of hoof nippers will help you trim the hoof to keep it straight and even. Keep a firm grip on the nippers so that you don’t accidently cut into the sole and injure your animal.
Flatten and level the sole with a rasp that will let you file the bottom of the hoof like you would file a nail.
Step Four: Size the Shoe
Never choose smaller shoes over slightly bigger ones. Shoes that are too small can’t be adjusted to fit your horse’s foot, but shoes that are too big can still be ground down to the right size and shaped for your horse’s foot.
Make any necessary adjustments with a blacksmith before having the shoes fitted onto your pet. A metalworker will be able to shape the shoe with their tools, while a farrier can only grind down the shoes until they’re the correct fit. Unless that farrier has blacksmithing tools and experience, of course!
Step Five: Secure the Shoe
This bit may sound a little horrific, but to fix the shoes to your horse, you’re going to need to secure it using nails. If it’s your first time fitting shoes to your horse, do not attempt to do this alone because you can injure your horse if you aren’t careful enough.
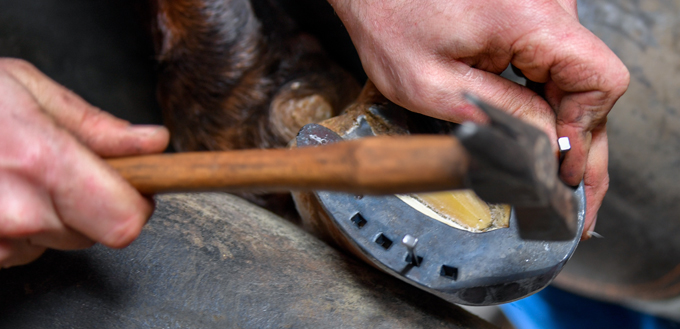
The nail must go through the top of the hoof wall at an outward angle, never inward. Inward is a sure-fire way to hobble your animal because you are going to stab the sensitive inner part of their hoof with something that has very sharp edges. They may not be able to stop the first nail going in, but you can bet they’ll stop anymore from being driven.
Ensure that the smooth side of the nailhead faces toward the outside of your horse’s hoof. When you’re driving the nail in, the tip of the nail will only angle down towards the side that the smooth area is facing.
The special nails that are made for securing horse shoes to horses should have a bevel on one side. Use this to guide the tip of the nail through the hoof wall.
Shoes that use nails are a bit old-school now and you may find that your stable or horse school prefers to use glue to hold the shoe in place. If you are nervous about using the nails, use the glue on shoes, instead.
Once the nails are in, bend and remove the nail tips from the top of your horse’s hooves. You can use the claw side of a hammer and a pair of nippers to complete this task.
Will the Nail Hurt My Horse?
Think of your horse’s hooves like your own nails. When you clip your nails along the white area to shorten them, it doesn’t hurt, right? It only hurts if we rip a nail down to the nailbed or cut the edges of our fingertips.
The hoof wall is similar to our own human fingernail and the tip of our fingers. You’ll only hurt your horse if you drive the nail heads in the wrong direction when fixing the shoe to the hoof wall of your horse’s feet.
Step Six: Finishing Up
Clinch the nail by setting a clinch block under the nail on the outside of the hoof wall. Hit the nail with a hammer to drive it into the wall or use a clinch cutter tool and give it a firm squeeze. Either will work for this process.
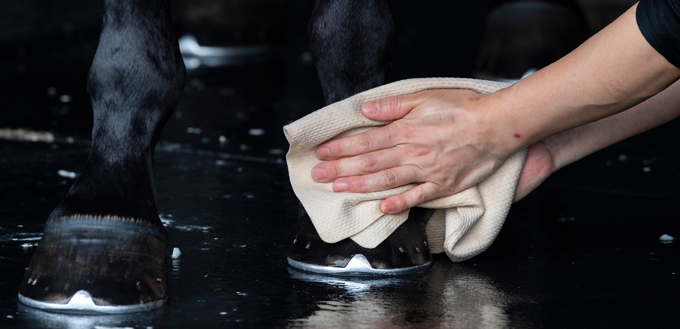
File down any rough spots on the wall. This is just a quick once-over to finish up the hoof you’ve been working on. If you can’t run a cloth over the wall without it catching, you’ve got more stuff to do because the wall should be completely smooth at this point.
Repeat for the other three feet.
Ill-fitting shoes will affect your horse’s gait, cause your horse discomfort, and could even injure your animal if installed poorly.

FAQs:
Q: Are all horses’ hooves difficult to shoe?
A: Some horses will be more sensitive than others, so it may seem like it takes a long time to complete that horse’s shoeing. What you need to remember is that there’s a lot of sensitive tissue in the hoof of a horse, which means not all horses’ hooves will be as easy to shoe. In fact, you may even find that a single horse has one shoe foot that they hate having serviced, while the other three go quite quickly.
Q: Do horse hooves grow?
A: It’s best to have your horse’s feet trimmed every six weeks or so because of hoof growth. Both the hind feet and the front feet of a horse will experience growth, but some environmental factors can wear the hoof unevenly. Trimming ensures that your horse steps with their body weight equally on each hoof.
Q: What should I do if my horse has lost shoes?
A: Lost shoes can be replaced. Depending on the wear and tear on the remaining shoes, a farrier may decide to just have each shoe replaced to keep every hoof in the same condition. If you continue to lose shoes, consider traditional shoes as opposed to glued-on ones, and have the next set of shoes professionally fitted.


